Saturday, January 5, 2019

Centre Rotations for Picture Cubes

Picture Cubes can be solved in the same way as ordinary Rubik's cubes except for the problem of centre rotations.

So after solving the first face (top) correct the centre rotation of each side face in turn. Use FR to move the completed top face to a place of safety and then rotate the front face to the correct orientation and then use R'F' to bring the top back. Repeat for all four sides. The remaining bottom face now will automatically have the correct orientation.

But suppose you had a fully solved cube except that the centres were rotated wrongly. This algorithm addresses that problem using the 6-Spot procedure described in my earlier post. I should credit Greg's Puzzles on YouTube who highlighted the use of the 6-spot solution in this situation.

Hold the cube so that a side that needs a centre rotation is facing upwards. There should be another adjacent side that also needs a rotation in the opposite direction and this should be positioned so that it faces front. 
In the example below the top centre (green) needs a 90 degree CW rotation and the front centre (red) needs a 90 degree CCW rotation. Note that this procedure also works for 180 degree rotations. 
First rotate top face so that the Green centre is rotated in the correct orientation (in this example 90 degrees CW):

Then perform the 6 Spot move:

Now rotate the top face in the opposite direction to which it was turned first of all (in this example 90 degrees CCW):

Finally perform the 6-Spot solution move

Use the same procedure on other pairs of faces if their centres also need rotation.
You may find a situation where a cube is totally solved except for opposite sides which need a centre rotation. The solution is to use the above procedure twice and, in the process, temporarily rotating another intermediate side centre.
Where only the upper centre needs a 180 degree rotation use: R,U,R',U x5


Wednesday, January 2, 2019

Six & Four Spot Instructions

To make a six-spot:


First use the M' move to push up the 'middle' slice (imagine you are pushing the red centre onto the green side). Then use the S' move to push the 'standing' slice upwards.
Finish the move with M & S. The complete move is M' S' M S

To Solve a six spot. Find a set of three adjacent sides where the centres can be moved into the same coloured sides (here Red, Green & White).


Push a centre up to match the top colour (S'). Then push the other centre also up (M'). Finish of with S & M. The complete move would be S' M' S M

To make a four-spot start off with a six-spot.
Push a centre up to match the top colour (S'). Then push the other centre DOWN (M). Finish off with S & M'

To solve the four spot: perform a 6-spot move followed by the 6-spot solution.

Rubiks Cube Drawings using Visio

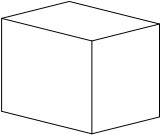
In Visio, first draw a set of lines in a square shape

Then make copies of selected lines into groups as follows

Select one group and then on the Developer ribbon select "Operations" and in the drop-down menu select "Join". If you don't have the Developer ribbon look in File>Options>Advanced>General>Run in Developer Mode
Then join up the other two shapes.
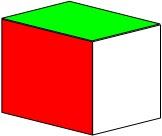
Now you can fill each shape with a colour of your choice. The one on the right is filled with white:


Now move them together by hand like this (sorry snap/glue doesn't work)

Group the three together so that it can be moved and copied as a single block. You can find the Group function on the Arrange section of the Home ribbon. 
Make copies of this block and move them around (again by hand) to make a slice:


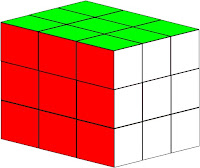
Then group the slice and make copies to build a whole Rubik Cube like this:

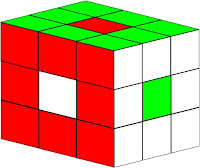
Then you can change the fill colours of individual block sides. You may like to select the whole thing first and perform an un-group operation so that it is easier to select individual block sides for colour change. 


Have Fun